Night shots are a great way to show off the beauty of your surroundings while it’s dark. With the GoPro Night Lapse, you can capture the way the world changes during the hours of darkness. It’s an excellent tool for showing off your favorite city, and capturing how beautiful it looks at night.
However, before you go out there to capture night lapse shots with your GoPro camera, there are a few things you should know.
In this article, you’ll get to know about some useful tips to create epic night lapses.
What is GoPro Night Lapse
As the name suggests, the GoPro Night Lapse refers to time lapse videos captured in dark and low light conditions. When the GoPro night-lapse mode is on, the camera allows for longer exposure time to capture clearer night time shots when there isn’t much available light around you.
To achieve this, it automatically adjusts the shutter speed to let more light in and picks the interval that will give you the best results.
Depending on how lit your surroundings are at any given moment, users can also manually choose different shutter speeds. Lower lighting usually needs higher exposures so that more detail is captured from the darkness.
Brighter areas like city skylines under streetlights would require less intense photos since they’re already illuminated by artificial sources such as lamps and windows. But, in case you aren’t sure, you can set the shutter speed to ‘Auto’ and let your GoPro decide.
Please note that GoPro Night Lapse shots are strictly for those occasions when your camera is stationary and held by a mount or a tripod.
GoPro Night Lapse Photo
Just like time lapse photos, you can also capture Night Lapse photos with GoPro. The photo format takes a continuous series of photos at set intervals during your night shoot. You can then look through all of your photos and find the best shots later.
To use this mode, all you need to do is – go to Format in settings and choose Photo to capture a series of photos at set intervals, out of which you can select the best ones later on.
How to Setup GoPro Night Lapse
Here’s how you can setup GoPro Night Lapse:
To enable Night Lapse on the Hero 12 Black/Hero 11 Black / Hero 10 Black / Hero 9 Black / Hero 8 Black
- Swipe left until you reach Time Lapse mode.
- Tap the current Time Lapse mode setting, then scroll down to Night Lapse.
- Tap the pencil icon to adjust your Night Lapse settings.
To enable Night Lapse on other GoPro cameras
- Select the Mode/Power button until Multi-Shot is selected.
- Press the Settings/Tab button and change the Mode setting to Night Lapse.

GoPro Night Lapse Settings
After setting up the Night Lapse mode, it’s recommended that you choose the best settings for you to shoot. Here are those settings that you need to look at:
- The camera’s Shutter speed
- Night Lapse photo interval
How to Adjust the Shutter Speed on Your GoPro
Hero 12 Black/ Hero 11 Black / Hero 10 Black / Hero 9 Black / Hero 8 Black
- Once in Night Lapse mode, press and hold the icon in the bottom middle of your camera screen, OR tap this icon and then tap the pencil icon next to Night Lapse
- Tap Shutter
- Use the sliding scale on the right side of the screen to choose your desired Shutter speed
Hero 7 Black
- On the camera touchscreen swipe left for Photo or right for Time Lapse, depending if you want Night Photo or Night Lapse Photo.
- Tap the camera icon on the bottom left and select either Night Photo or Night Lapse Photo option
- Tap the settings option in the bottom-middle of the touch screen.
- Select the Shutter option and choose your desired speed.
Hero 6 Black / Hero 5 Black
- First press the Mode/Power button until Photo or Multi-Shot is selected.
- Tap the Photo icon along the lower left corner on the back LCD screen.
- Tap the Night photo mode.
- A Shutter option is now available along the bottom center of the LCD screen. Tap on the Shutter option.
- Swipe left or right or tap the desired shutter speed (the default will be Auto).
Read more what is a shutter speed and how to adjust it manually click the link.
How to Adjust the Night Lapse Interval on Your GoPro
Hero 12 Black/ Hero 11 Black / Hero 10 Black / Hero 9 Black / Hero 8 Black
- Once in Night Lapse mode, press and hold the icon in the bottom middle of your camera screen, OR tap this icon and then tap the pencil icon next to Night Lapse
- Tap Interval
- Use the sliding scale on the right side of the screen to choose your desired photo Interval
Hero 7 Black:
- Swipe right on the camera touch screen until the Time Lapse is selected.
- Tap the Time Lapse icon along the lower left corner on the back LCD screen.
- Tap the Night Lapse photo mode.
- Tap the setting option in the bottom-middle of the screen.
- Tap Interval and select your desired option.
Hero 6 Black / Hero 5 Black:
- First press the Mode/Power button until the Time Lapse is selected.
- Tap the Time Lapse icon along the lower left corner on the back LCD screen.
- Tap the Night Lapse photo mode.
- An Interval option (INTR) is now available along the bottom center of the LCD screen. Tap on the Interval option.
- Swipe left or right or tap the desired Interval setting.
GoPro Hero 11 Night Lapse Effects
Here are the three new night lapse effects that have been introduced in GoPro Hero 11 Black:
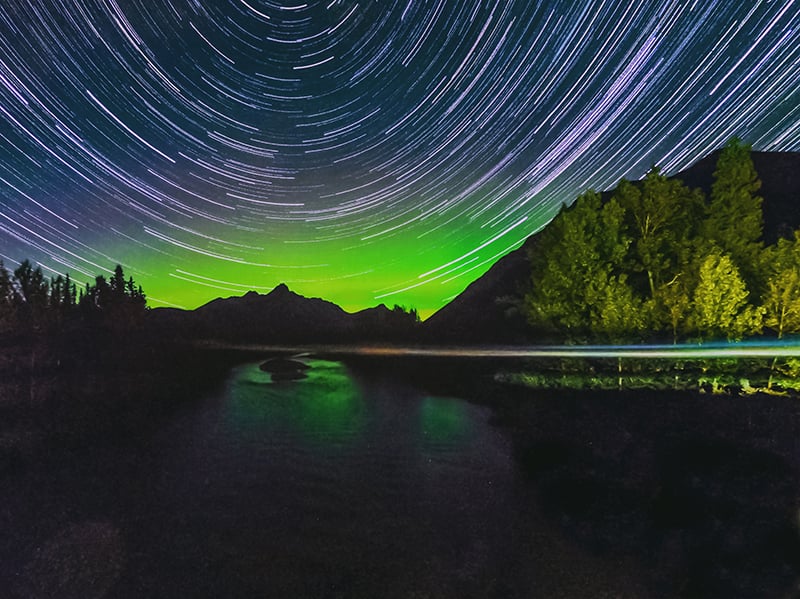
Star Trails
Star trails uses the Earth’s rotation and the stars to create beautiful trails of light across the sky. Mount your camera to a stationary object or tripod, point it toward the night sky and let physics take over. Use the trail length effect to choose maximum, long, or short trail lengths.

Light Painting
Uses a long exposure to let you create brilliant brush stroke effects with moving light. Mount your camera to a stationary object or tripod, grab a flashlight, glow stick, or another light source, and get creative.

Vehicle Light Trails
Mount your camera to a stationary object or tripod and point your camera at moving vehicles to create stunning light trail footage. Be sure to use the trail length effect to choose maximum, long, or short trail lengths.
Read more on GoPro Hero 11 Night Lapse in Settings Guide

7 Tips for Epic GoPro Night Lapses
Here are the seven useful tips to capture some amazing night lapse shots:
Keep your Camera Stable (Use Mounts)
A stable camera is absolutely necessary for quality Night Lapse footage. The extended exposure/shutter speed in Night Lapse allows the GoPro to capture even the minimal light available in the scene. However, this also means that if there’s any movement, of the camera or within the scene, it will be much more prevalent in the night lapse mode.
Therefore, using Mounting Accessories like the 3-Way’s built-in tripod, or other Tripod Mounts would help ensure that your camera remains in position.
Use Protune
Use Protune for photo features to fine-tune your Night Lapse sequences. Protune allows you to alter the White Balance, Color Profile, ISO Limit, Sharpness and Exposure Compensation.
Read more on Protune in the following article: GoPro Protune: Advanced Settings Explained + Best Settings For Photo & Video.
Use a Light Source
Night lapses without any light sources will hardly show anything. Therefore, if there’s no light source in the scene you’re recording, you can use either an external or built-in LED on your camera as a light source.
You can also use an external light source to enhance the quality of your night lapse footage. There are several third-party GoPro LED lights available that can be attached to your GoPro camera or used separately. These lights offer a higher intensity and wider range of colors than the built-in LED on your camera, resulting in clearer and more vibrant footage.
It’s important to note that using an external light source for night lapse footage may require adjustments to your camera settings, such as decreasing the shutter speed or increasing the ISO. Experiment with different settings and light sources to find the best combination for your specific shooting conditions.
Read more on ISO: What is GoPro ISO? (Effects & GoPro Settings Explained!)
Choose the Right Shutter Speed
To get great shots during night time, choosing the right shutter speed is extremely important so that you are able to get the appropriate light into the lens for best results.
For example, for dawn, dusk, twilight, or traffic scenes at night, you need a shutter speed of 2-10 seconds. However, for night sky with a distant/minimal light source like the moon or stars, the shutter speed of 20-30 seconds is optimal. And in case you feel that the level and intensity of light will change while shooting the night lapse, it’s best to set the shutter speed to Auto to let the camera adjust the shutter speed automatically.
Choose the Right Shooting Interval
For every second that you want in the final video, set up approximately 5 seconds worth of shooting intervals. For example, if you want 20 seconds per frame, set up 100 shots). This is called “shooting at double speed.”
Choosing the right shooting interval also depends on the type of motion you want to capture. For fast-moving subjects like car lights, a shorter shooting interval (such as 1-2 seconds) may be necessary to capture enough frames and create a smooth effect. For slower subjects or scenes, a longer shooting interval (such as 10-15 seconds) can be used.
It’s important to keep in mind that shooting interval also affects the final length of the night lapse video. A shorter shooting interval will result in a longer final video, while a longer shooting interval will result in a shorter video. So, it’s important to determine the desired length of the final video before selecting the shooting interval.
Take Test Photos Before Shooting
Just like standard time lapse sequences, Night Lapse involves taking photos over an extended period of time. If the situation permits, you should take a couple of test photos with the camera in position before shooting. This will allow you to make any necessary alterations to the settings, prior to capturing a long Night Lapse sequence.
Use Video Editing Software for Post Production
You can use a good video editing software like GoPro’s own GoPro Studio to achieve great results during post production. It will help you compile the sequence, alter the speed of playback, and apply features like color correction and panning.
How Long is Night Lapse GoPro?
The duration of a Night Lapse video on GoPro depends on the settings you choose.
You can set the duration of each individual exposure, typically ranging from 2 to 30 seconds, and the overall length of the time-lapse video, which can be up to 8 hours long.
So, for example, if you set the exposure time to 10 seconds and the overall length of the video to 4 hours, you would end up with a video that is 1 minute and 20 seconds long.
Keep in mind that the length of your Night Lapse video also depends on the available storage space on your GoPro’s memory card.

What is The Difference Between GoPro Time Lapse and Night Lapse?
GoPro time lapse and night lapse are two different shooting modes available on GoPro cameras. The main difference between them is the time of day at which they are intended to be used.
Time lapse mode is used during the day to capture slow-motion footage of events that unfold over a long period of time. It involves taking a series of still images at regular intervals, which are then compiled into a video sequence that shows the events unfolding at a much faster pace.
On the other hand, night lapse mode is specifically designed for use in low-light or nighttime conditions. It works by capturing a series of long-exposure images at regular intervals, which are then compiled into a video sequence that shows the scene as it evolves over time. This mode is particularly useful for capturing star trails, light painting, and other night-time scenes that require longer exposure times.
Time lapse mode is for capturing events that happen during the day, while night lapse mode is for capturing night-time scenes that require longer exposures. Read more on Time lapse: GoPro Time Lapse Settings [Full GUIDE].

Can GoPro Shoot Night Sky?
Yes, GoPro cameras can shoot the night sky. With the right settings and accessories, you can capture stunning time-lapse and night-lapse footage of the stars and the Milky Way. To shoot the night sky with a GoPro, it’s important to choose a location with minimal light pollution, use a tripod to keep the camera steady, and adjust the settings to a high ISO and a slow shutter speed.
It’s recommended to use a wide-angle lens and to set the focus to infinity. If you have a new GoPro hero 13 a new wide-angle lens might be what you need.

Sharing is Caring ❤️
I hope this guide helped you learn how to create quality GoPro night lapse sequences 🙂
Thanks for reading!
If you found this article useful, please share it on social media with your family and friends!