Have you ever run outside with your GoPro to shoot a magnificent sunset only to realize, after the fact, that your footage looks very noisy?
If you answered yes, I feel your frustration.
Low light settings and GoPro cameras are not very compatible mates. But there is hope – we can, at the very least, make them talk.
That’s what you’ll learn in this tutorial – everything you need to know for setting up, shooting and editing footage captured in low-light situations.
Low Light Performance
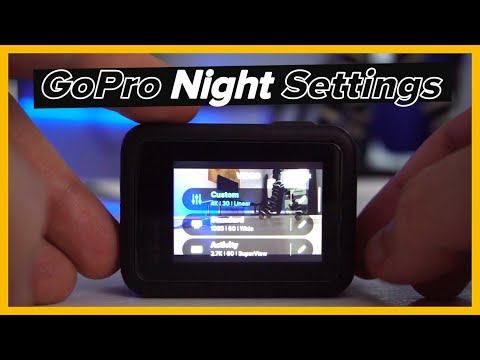
Watch this tutorial to lear secret low light settings:
In a digital SLR camera, there are four main factors determining its light performance: image sensor, ISO, aperture and frame rates. They also apply to our GoPros.
Here’s how they affect our images in relation to surrounding light levels.
Aperture
Aperture is the mechanism on your camera lens that controlling how much light reaches the image sensor. A large aperture (let’s say f/1.4), allows in more light, making it ideal in low light conditions. Conversely, a smaller aperture won’t let in enough light and will certainly render your footage super dark and profoundly disappointing.
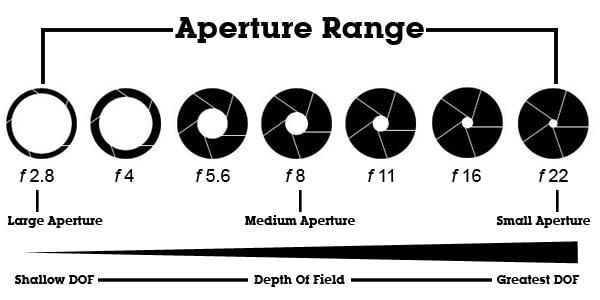
Aperture values (“f-stops”) can be confusing. A smaller value like f/2.8 refers to a larger aperture (ideal for low light), and vice-versa. Thankfully, GoPro users don’t have to worry about figuring out aperture values because it’s fixed. GoPro Corporate HQ decided to set its camera aperture to f/2.8, a standard in fixed aperture cameras, because it’s large enough to let in enough light, but not so large that excess light can’t be corrected in post-production.
Also check out a whole article about Aperture and F-stop Сhart>>>
ISO Sensitivity
This is where we move from your camera’s hardware functionality to software. In photography, ISO measures the sensitivity of the camera’s image sensor (more about this further down in the ISO section). The same principles apply to video – the lower the number, the less sensitive your camera is to light and the finer the grain.
If you’ve never seen a grainy image shot with a high ISO, now’s your chance with the following image:
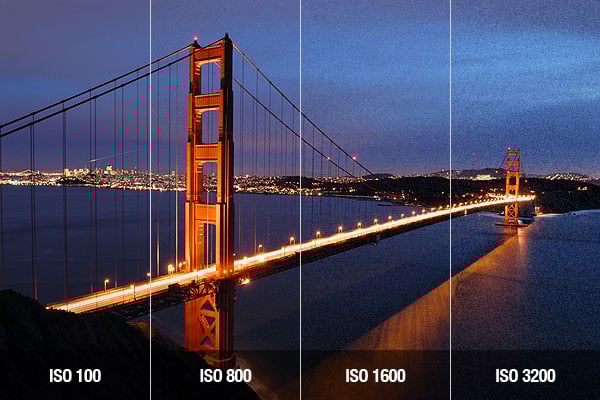
Out of the box, very GoPro model’s ISO is set to adjust automatically. Therefore, depending on your shoot’s lighting, your camera could potentially adjust the ISO anywhere from 100 to a maximum, super grainy value of 3200 ISO.
So, how do we avoid being disappointed by a noisy image? Simple. Set the ISO manually and keep it low! More about this further down in the Low Light Settings section.
Pro Tip: The latest GoPro models (Hero 12, 11, 10 and 9) can handle low light better than older models because of their updated hardware and software; specifically, the newer image sensors are more sensitive to light.
Image Sensor
The image sensor is the actual part of your camera that determines how light is received in order to produce the resulting image. Without it, you have no footage – it’s like the film in your camera, if your camera was a traditional SLR.
Larger sensors allow more light per pixel, which reduces noise level (graininess) and increases quality conversion of light to an RGB value that is most accurate to the subject, and also the highest range of contrast and color depth.
On the image sensor scale, your GoPro camera’s mid-size – it’s bigger than your mobile phone’s sensor but smaller than that of a mirrorless or DSLR camera.
Frame Rates
In the GoPro Settings tutorial we learned that frame rate is the number of images taken in one second to make your video. Standard film cameras normally shoot at 24fps, while GoPro camera’s have a few frame rate choices, depending on your model. You can shoot at a speedy 12fps to a super slow motion rate of 240fps.
The following pie illustrations should better explain why it’s better to maintain a low frame rate in low light. Imagine each pie slice as on frame.

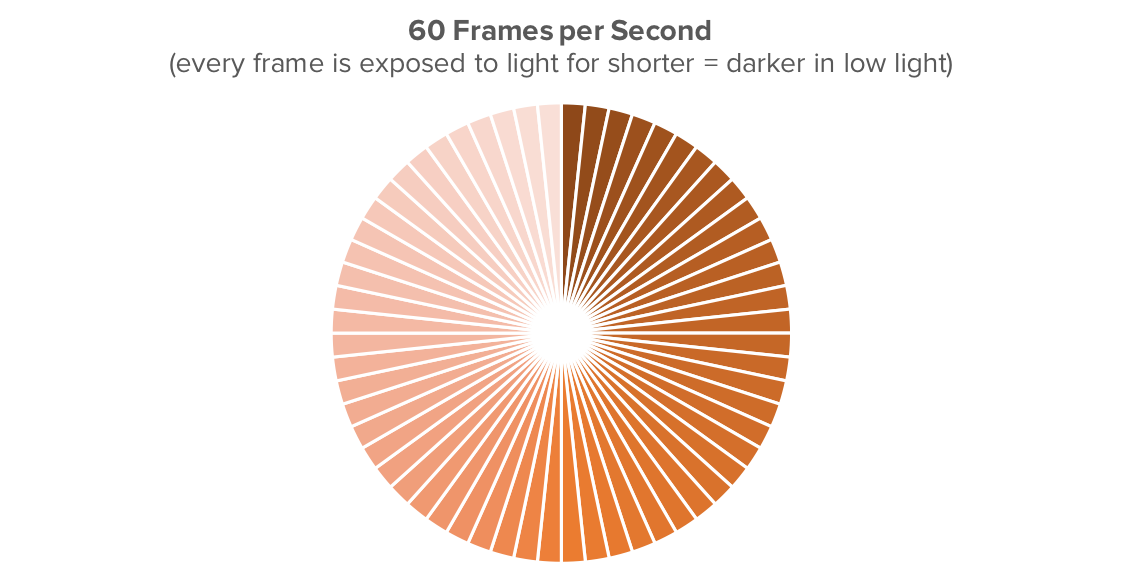
Still don’t get it? No problem. Here’s the breakdown:
- Each pie represents one second.
- Each slice represents a frame.
- There are 30 slices in one pie and 60 slices in the other pie.
- The slices in the 30 pie are larger (longer) than those of the 60.
- Larger slices represent frames with more exposure to light in one second.
- This ultimately means a brighter image (made up of 30 frames) captured in that one second.
- Footage captured at a lower ISO and a slower frame rate would still produce a brighter image with less grain/noise to ruin your day.
Pro Tip: If you’re going to shoot a low lit scene requiring slow motion, you’re better off shooting at optimized low light settings at a regular frame rate; you can adjust the speed of that scene in editing.
Best GoPro Low Light Settings
There’s always some give and take when trying to figure out the best settings for your low light situation. The following can serve as guidelines if you find yourself in the dark about low light video and/or photography shoots. (See what I did there?)
Low Light Video Settings
Frame Rate: Number of images taken in one second. 24fps, 25fps or 30fps.
ISO: Sensitivity to light. Higher ISO produces graininess/noise.
Enable Protune and set the range manually to ISO 100 (min.) – ISO 400 (max.)
Shutter Speed: Part of the camera controlling the amount of light reaching the image sensor.
Frame Rate of 24fps or 30fps to allow a slower shutter speed. If light changes (dark to light), enable Auto shutter setting, otherwise use Protune to manually lower its speed to 1/40s or 1/50s.
Stabilization/Hypersmooth: Built-in digital image stabilization to reduce shaky footage.
In low light conditions, we recommend disabling GoPro Stabilization (EIS) to minimize unwanted image distortion.
Sharpness: Sets the level of detail on images.
Keep sharpness setting as low as possible. Too much sharpness may create a noisy image.
Low Light Photo Settings
Things get a little easier when using your GoPro to shoot photos in low light. In Video mode shutter speed can’t go below 1/40s, but in Photo mode it can be set for longer – up to a few seconds in Night Photo Mode – to allow more light to reach the sensor. The caveat here is that your GoPro needs to be very still, ideally attached to a tripod. Shooting in RAW also helps capture better image quality in low light.
Note: Recommended ISO and SHARPNESS Video settings (above) also apply in Photo mode
Dark: use Night Photo mode and set a long exposure (5s, 20s)
Less dark: use normal Photo mode and set a longer exposure (1/10s, 1/20s)
3 Tips for Shooting in Low Light
Boost your light source
It sounds like one of those obvious tips, but you’d be surprised at how often it’s overlooked. Adding another light source, even with your phone’s flashlight, can be very effective in a video shoot. Especially if it means you can keep your ISO as low as possible.
In this video I compare two ISO settings while introducing my phone’s flashlight:

Make Slow Camera Movements
If you’re shooting your low light scene at a slower shutter speed (e.g., 1/40s), keep your movement slow and even. If your camera is jerky and too fast, you’ll cause a motion blur effect in your shot, just like in the background of the following shot.

Stabilize your GoPro
With your built-in Electronic Image Stabilization (EIS) disabled, you still need to figure out the best way to keep your shots even and smooth. A gimbal is a quality addition to your GoPro kit because it’s a hardware solution instead of a risky software fix. We can’t recommend this piece of equipment enough.
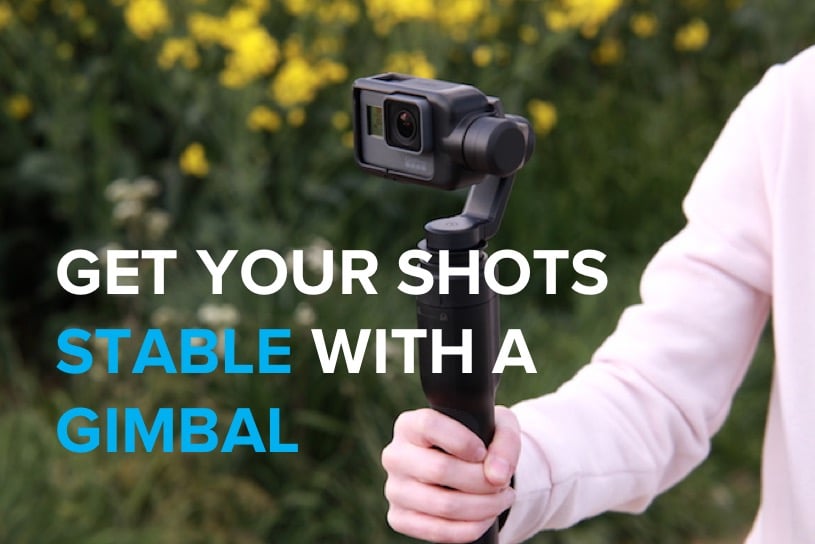
Here are our favorites for GoPro:
- GoPro Karma Grip (official GoPro accessory) – pricey but very reliable and fully compatible with GoPro functions.
- Hohem iSteady Pro 3-Axis Handheld Gimbal Stabilizer – solid product and good value for the price.
How to Edit Low Light Videos (Better)
If you chose to skip the previous easy tips on how best to shoot low-light photos and videos, you probably pretty disappointed about all that graininess and noise you’re staring at. We know. It hurts. But wait! It’s not too late to try a fix.
With the help of editing apps, we can reduce or eliminate that pesky image noise.
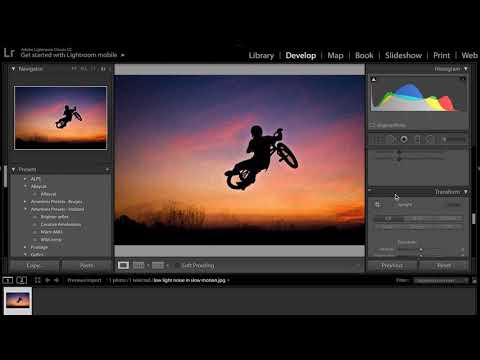
Reduce Grain on Photos
Most professional photo editing apps have a bundled tool to reduce image noise or grain. Try the following quick tutorial on how to to do this using Adobe Lightroom.
Reduce Grain on Videos
There’s a couple of ways you can go about to reduce noise on video:
Within the editor: Some video editors, such like Adobe Premiere, After Effects, and Final Cut Pro (from ver. 10.4.4), have got embedded video noise reduction functions by default. If you edit with one of the above editors, just search for the Noise Removal function within the app’s effects. Play around with the amount until you find the one that works for you, and apply it. The Noise Reduction Tool works pretty well unless you have a heavy noisy video.
Paid Plugins: Then there’s professional plugins like Neat Video and Red Giant which may achieve better results when it comes to heavy video noise. But it all comes to a cost. We tried them both – do we think they are worth the expense?
If your footage has a disappointing amount of noise and you’re planning more low-light shoots, it’s well worth the investment to have a good noise reduction/removal tool at your disposal. Otherwise try to use the default video noise removal within one of the editors discussed above.
Pro Tip: Noise Reduction With Final Cut Pro X (older than 10.4.4)
In older versions of FCPX (before 10.4.4), you won’t find the Noise Reduction Tool by default. However there’s a workaround that you can use: this is done by applying an effect called Cartoon. This will reduce the details in your video, making it look almost like a cartoon if it was set to maximum. So you want to set it at just the right amount to ensure your footage looks as real as possible, and with less noise.
Here’s the Cartoon effect in FCPX:

Under the Cartoon effect’s settings you can adjust the amount of it. My suggestion is not to exceed 65%.
