GoPro color grading is a crucial step in the post-production process that can greatly enhance the visual quality of your GoPro videos.
It helps to fix videos that look too “flat” or undersaturated.
In this guide, you’ll learn the basics of GoPro color grading, including why it is important and some tips and tricks for getting the best possible results.
Discover my tutorial on GoPro color grading:
Color Grading & Color Correction
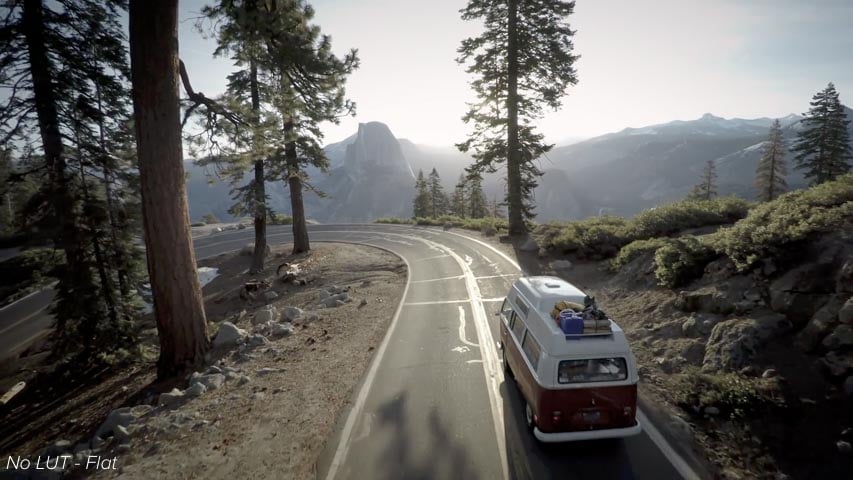
Color grading and color correction serve to fix “flat” color. Many times you’re supposed to correct this footage in post-production by color correcting or color grading the the footage.
Protune setting “flat” color lets you record videos without any added color style. The other option (by default) is “GoPro” color which adds a specific color style directly in-camera.
What is color correction
Color correcting is the process that balances color; it includes adjusting exposure, contrast and simple color levels. This process produces the most realistic representation of what your eyes actually see. If white and black levels are what your eyes see, the footage colors should be balanced. On most professional editing apps, color correction is a fairly standard and readily accessible feature.
What is color grading
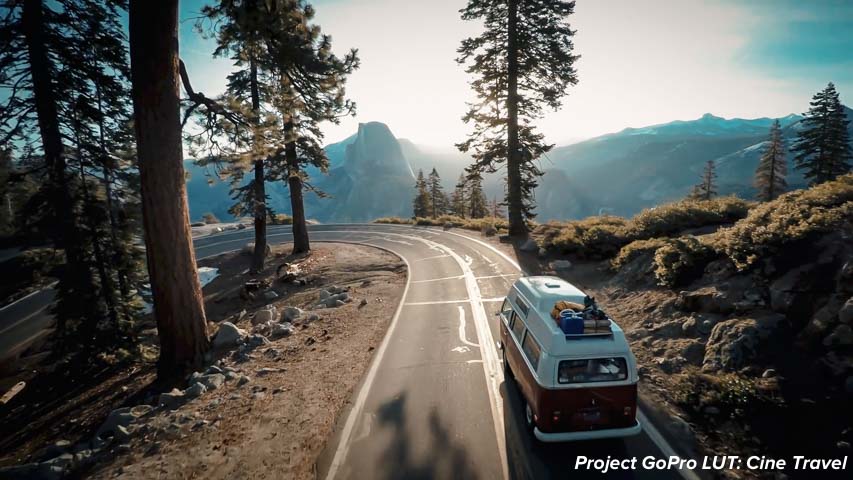
Color grading is where you create your video’s aesthetic. It’s an entirely optional process, especially if film realism is your goal. Of course, color grading does help express a visual tone or mood to heighten the narrative. For example, boosted orange and blue tones could be used to enhance a travel story, as depicted in the following color graded image:
How Do You Color Grade GoPro Footage?
Color grading GoPro footage involves adjusting the exposure, contrast, and color levels of your videos to create a more balanced and visually appealing image. Here are the basic steps to color grade your GoPro footage:
Choose a color grading software
There are many software options available for color grading, including Adobe Premiere Pro, DaVinci Resolve, and Final Cut Pro. Choose one that you are comfortable with or willing to learn (read on to learn about color grading with the most popular programs).
Import your footage
Import your GoPro footage into your color grading software.
Adjust the exposure and contrast
Adjust the exposure and contrast of your footage to create a more balanced image. This can involve adjusting the brightness and contrast levels to ensure that the image is not too dark or too bright.
Adjust the color levels
Adjust the color levels of your footage to create a more vibrant and visually appealing image. This can involve adjusting the saturation, hue, and temperature of the image.
Apply color grading presets
Many color grading software options offer presets or LUTs (lookup tables) that can quickly apply a specific look or color grade to your footage
Fine-tune your color grading
Fine-tune your color grading to create the perfect look for your footage. This can involve adjusting individual color channels or using masking tools to apply color grading to specific parts of your footage.
Export your footage
Export your color graded footage to your desired file format and resolution.
The issue with editing colors manually
Other than skills, color grading may take a long time. Even for professionals.
So what’s the solution if you don’t want to invest such a long time in manually color grading your films?
Use Color Grading LUTs!

What are GoPro LUTs
LUT stands for Look Up Table and it is used in color grading to transform a color value input (as recorded by your camera) into a desired color value output (as set by the LUT). Simply put, LUTs are “preset” color values so you can easily apply professional color grading yourself and give your desired look to your video instantly.
Watch this video to see how much your videos or photos can change before and after applying a LUTs:
Among professional film editors, there are dedicated teams of people just for color grading films – they’re called Film Colorists. So you can imagine how widely- used this niche can be. We made our own GoPro color grading filters packs, specifically designed for GoPro footage style. They are essentially color presets designed by film colorists for filmmakers who have very little or no experience in color grading. It makes this skill that much more accessible so that anyone can apply professional level color tones.
Our cinematic color grading pack offers a wide range of color tones to cover most GoPro activities.

Included in this package there are over 100 color presets:
CINEMA – Cine Automobile, Cine Cycling, Cine Drone, Cine Hiking, Cine Motorcycle, Cine Ski, Cine Sport, Cine Sunset, Cine Surf, Cine Travel, Cine Underwater, Cine Vlog
ORANGE & TEAL – Orange Teal Colorful, Orange Teal Fantasy, Orange Teal Light, Orange Teal, Retro, Orange Teal Vivid
WARM – Adventure, Desaturated, Landscape, Lover, Nature, Pastel Vibes, Pool Party, Retro, Sepia Tone, Sparta, Tropical, Vintage
COLD – Aqua, Blue Lake, Cold Fade, Dreamy, Blue, Dreamy Green, Faded Ice, Green Nature, Light Punch
and more…
How To Use GoPro LUT’s
Cameras
Compatible with footage from all cameras and drones (including the GoPro Karma and DJI’s full line-up of drones (Phantom 1/2/3/4, Mavic Pro, Spark, Mavic Air and others). Optimal compatibility with Protune GoPro flat color profile.
Software
Works with most photo & video editing software:
- Adobe Photoshop
- Premiere Pro
- Adobe Lightroom Classic
- Adobe Speed Grade
- Avid Media Composer
- Edius
- Cyberlink Color Director
- Final Cut Pro X
- DaVinci Resolve
- Sony Vegas
- Wondershare Filmora
- Power Director
- Capture One
- LumaFusion (iOS)
- 3D LUT Mobile (iOS/Android)
To install the GoPro LUTs is quite simple even if you are not so familiar with editing. Below you can find some tutorial/instructions on how to apply presets to on your video editor:
Step 1: Open up your favorite video editing program (Compatible w/ Photoshop, Premiere Pro, Final Cut Pro X, DaVinci Resolve & more)
Step 2: Select a clip and in the color grading section browse for a new LUT
Step 3: Adjust the amount, and hit apply!
How to Install LUT’s in Lightroom Classic & Adobe Camera Raw
First, in Lightroom, go to the Lightroom Preferences (NOT Catalog Preferences) and make sure that the “Store preset with this catalog” option is not checked.
Then, navigate to the Camera Raw > Settings folder and copy the .xmp preset files to that folder. Here is an alternate method of locating that folder:

Mac: ~ / Library / Application Support / Adobe / CameraRaw / Settings
Windows: C: ProgramData Adobe CameraRaw Settings
Alternately, you can access the folder with this method:
- Open Lightroom CC (make sure it is updated to the new version)
- Go to Lightroom > Preferences
- Click the “Preset” section at the top
- Click the “Show Lightroom Presets Folder”
- Ignore the folder it highlights, and instead go up to the Camera Raw folder and open it
- Open the Settings folder and copy your .xml presets files into this folder
- Restart Photoshop or Lightroom Classic and the presets/profiles should be installed.
How to Install LUTs in Lightroom CC
- Open Lightroom CC and access the Presets panel.
- Next, click on the “…” drop down and select Import Presets.
- Navigate to the folder containing the .xml files and select it to import into Lightroom CC. Your profiles will then install and are ready to use.
How to Install LUTs in Adobe Premiere Pro
In this video I show you how to install LUTs on Adobe Premiere Pro:
How to install LUTs in Davinci Resolve
In this video tutorial I show you how to install LUTs on Davinci Resolve:
Can You Colour Grade in GoPro Quik?
Unfortunately, no. GoPro Quik does not offer extensive color grading features. While you can adjust the brightness, contrast, and saturation of your videos in Quik, the software does not offer the same level of control and precision as professional color grading software.
However, if you are looking for a simple way to enhance the color of your GoPro footage, Quik can still be a useful tool. The software offers a number of preset filters that can quickly apply a specific look or color grade to your footage, and you can adjust the intensity of these filters to your liking.
Additionally, Quik’s “Hilights” feature can automatically select and edit the best moments from your footage, which can save you time in the post-production process.
![]()
Thanks for reading!
I hope this guide helped you learn about GoPro Color Grading:)
Sharing is Caring ❤️
If you found this article useful, please share it on social media with your family and friends!